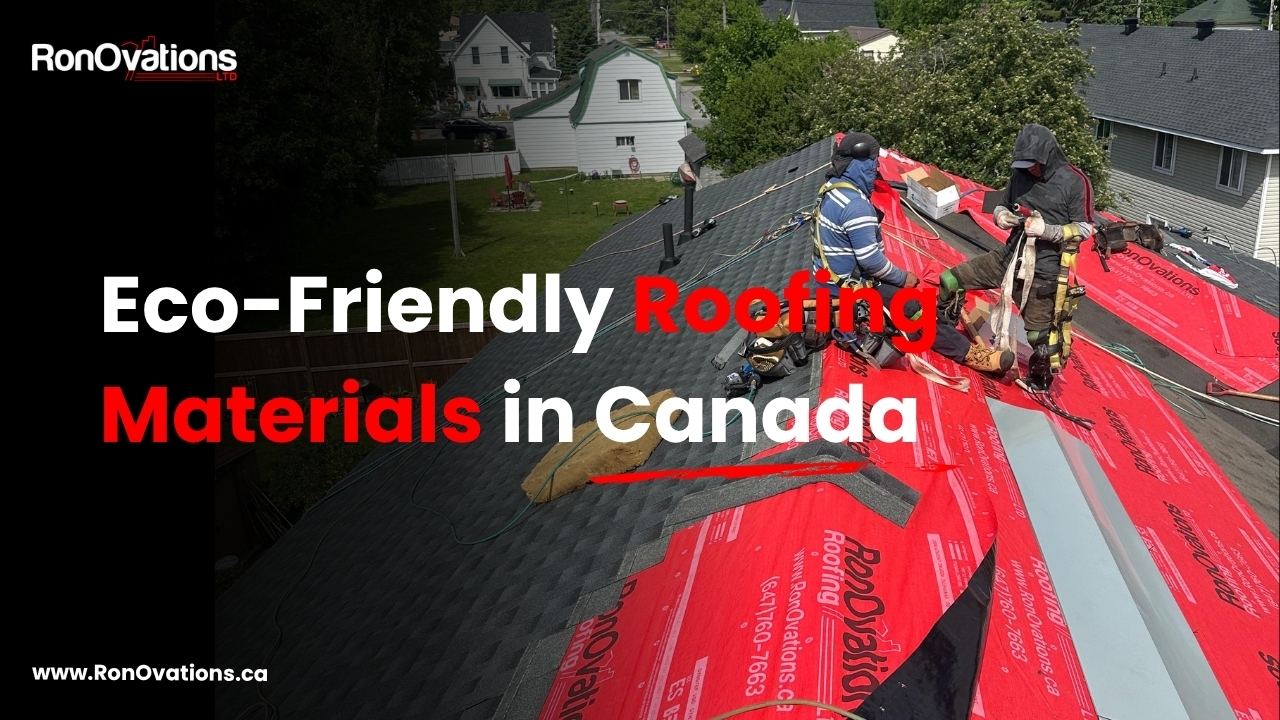
Blown-in insulation costs $1.00 to $2.50 per square foot installed in Ontario, delivers R-2.2 to R-3.8 per inch depending on material, and can cut heating energy loss through the ceiling by 40 to 50 percent when topping up from R-20 to R-50. On-site installation takes 4 to 8 hours for a typical attic. This blown-in insulation guide covers material choices, OBC code requirements, real-world costs, and seasonal maintenance so you can make a confident decision for your Canadian home.
What Is Blown-In Insulation and How Does It Work?
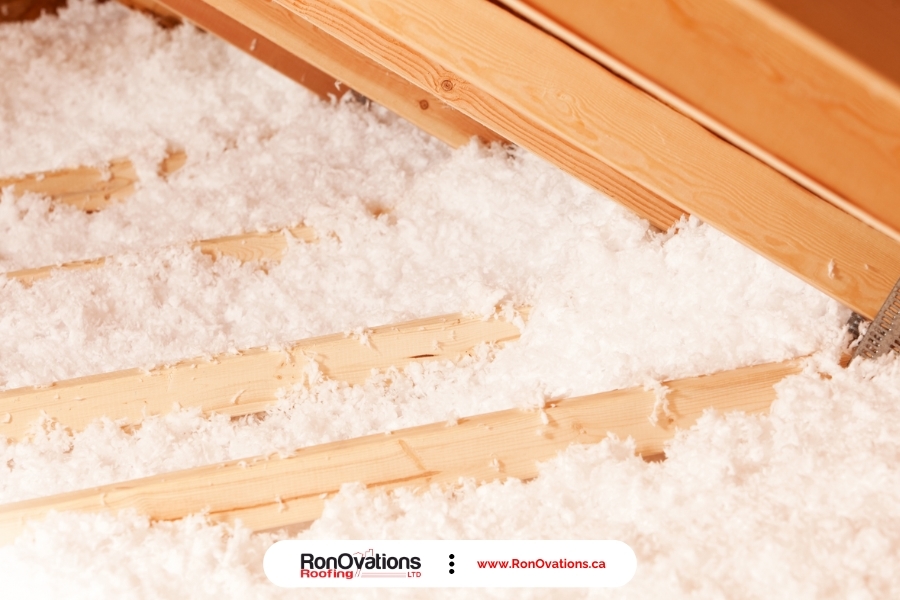
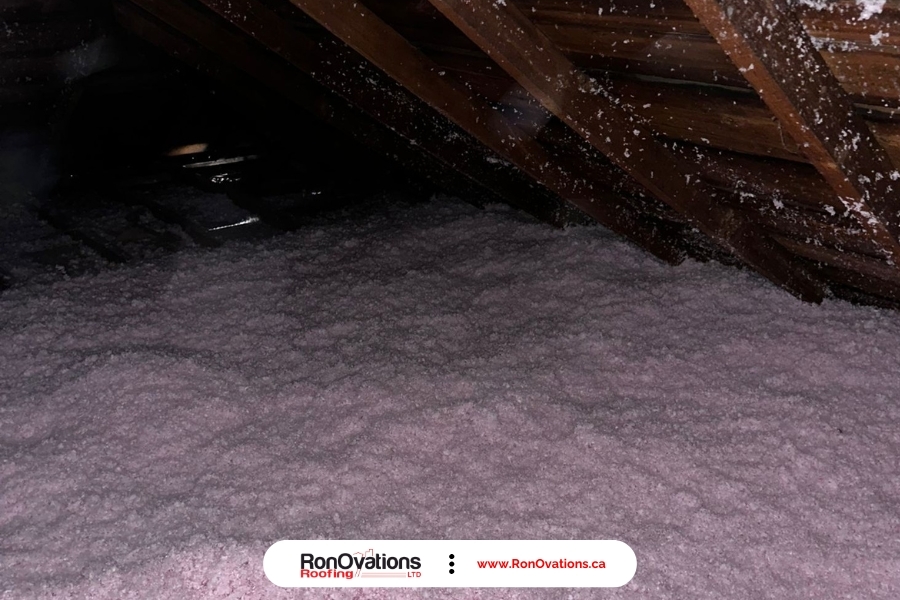
Blown-in insulation is loose-fill fibreglass or cellulose propelled into attic cavities with a pneumatic machine, forming a seamless thermal blanket. This blown-in insulation guide covers everything Ontario homeowners need to know, from material selection to cost breakdowns. The method fills irregular joist bays and wraps around wiring, plumbing stacks, and junction boxes that rigid batt insulation simply cannot conform to. Natural Resources Canada identifies attic insulation upgrades as one of the highest-impact energy retrofits for existing homes.
In our project work across Ontario roofing and insulation services since 2012, we frequently find older homes with uneven batt insulation that leaves significant thermal gaps along eaves and around recessed lights. Blown-in material addresses those gaps far more effectively than re-cutting batts.
How does blown-in insulation differ from batt insulation?
Blown-in insulation provides more consistent coverage by filling small gaps, corners, and irregular spaces. Batt insulation can leave voids if not cut precisely to fit each joist bay. For attic retrofits, blown-in is generally preferred because it can be installed directly over existing insulation without removing drywall or disturbing vapour barriers.
What types of homes benefit most from blown-in insulation?
Homes with irregular attic framing, balloon-frame construction, older homes with compressed or shifted insulation, and any dwelling undergoing an energy efficiency upgrade benefit most. Two-storey homes with knee walls and cathedral ceiling transitions also see major improvements because blown-in material reaches areas batts cannot. For many Canadian homeowners asking what the best insulation for Canadian homes is, blown-in consistently ranks at the top for attic retrofits due to its versatility and cost-effectiveness.
Fibreglass vs Cellulose: Choosing the Right Blown-In Material
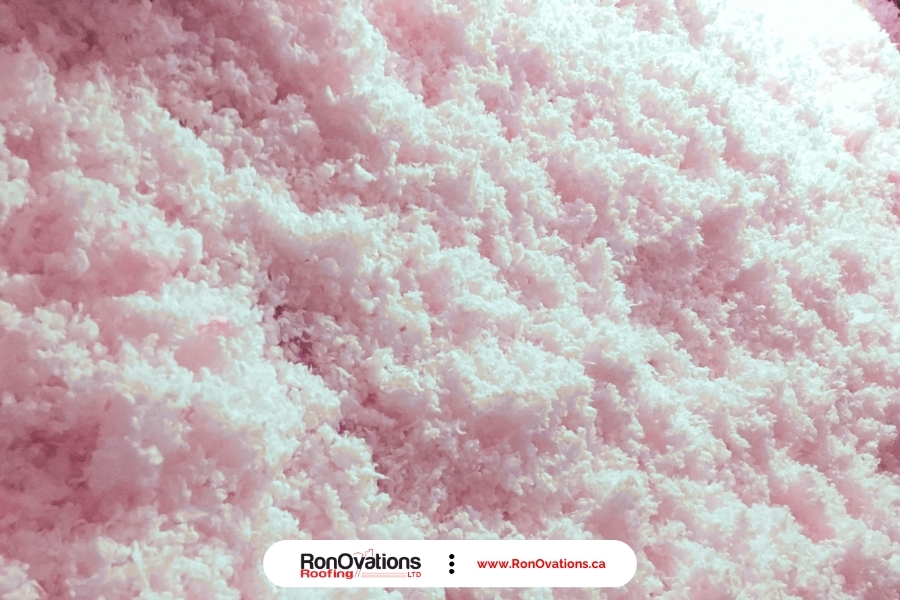
Fibreglass blown-in insulation, such as Owens Corning AttiCat, offers an R-value of 2.2 to 2.7 per inch, is non-combustible, and resists moisture absorption. Cellulose, manufactured from recycled newsprint treated with borate fire retardant, provides R-3.2 to R-3.8 per inch and delivers better air-sealing properties due to its higher density. However, cellulose can settle 15 to 20 percent over time, so experienced installers over-blow to compensate. Fibreglass settles far less, roughly 2 to 4 percent.
Crews we work with often see cellulose perform well in tightly sealed attics where moisture is controlled, while fibreglass is preferred where moisture exposure is a concern. Older Ontario homes with soffit ventilation issues or a history of ice damming are a common example where fibreglass is the safer choice.
Which blown-in material has a higher R-value per inch?
Cellulose delivers a higher R-value per inch (R-3.2 to R-3.8) compared to fibreglass (R-2.2 to R-2.7). That means you need roughly 14 to 16 inches of cellulose to reach R-50, versus 18 to 22 inches of fibreglass. In attics with limited headroom, cellulose can be the more practical option.
Is cellulose insulation safer than fibreglass?
Both materials are safe when installed correctly. Cellulose is treated with borate-based fire retardants and meets CAN/ULC-S102 flame-spread requirements. Fibreglass is naturally non-combustible. The key safety factor is proper installation, including maintaining clearances around recessed lighting fixtures and chimneys as required by the Ontario Building Code.
| Material | R-Value per Inch | Moisture Behaviour | Fire Rating | Settling Rate | Cost per Sq Ft (Installed) |
|---|---|---|---|---|---|
| Fibreglass | 2.2 – 2.7 | Low absorption | Non-combustible | 2 – 4% | $1.00 – $2.00 |
| Cellulose | 3.2 – 3.8 | Moderate absorption | Borate-treated retardant | 15 – 20% | $1.25 – $2.50 |
Insulation R-Value Explained for Ontario Homeowners
R-value measures thermal resistance; higher numbers mean better insulating performance. The Ontario Building Code (OBC) Supplementary Standard SB-12 requires a minimum of R-50 for attic insulation in most of southern Ontario and R-60 in colder northern zones. Many existing Ontario homes built before 2012 have only R-20 to R-30 in the attic, well below current code.
R-value is cumulative. New blown-in insulation adds to the existing total as long as the old layer is dry and undamaged. Upgrading from R-20 to R-50 can reduce heating energy loss through the ceiling by roughly 40 to 50 percent, according to Natural Resources Canada. That single upgrade often delivers the best return on investment of any building envelope improvement.
What R-value does the Ontario Building Code require for attics?
OBC SB-12 mandates R-50 for attics in Climate Zone 6 (most of southern Ontario) and R-60 in Climate Zone 7 (northern Ontario). If your home was built before these standards were updated, your attic likely falls short. A quick depth check with a ruler at multiple points can confirm whether a top-up is needed.
How Blown-In Insulation Improves Energy Efficiency
The attic is the largest surface area separating conditioned living space from unconditioned space in most Canadian homes. Natural Resources Canada data shows heating accounts for about 60 percent of residential energy use, making attic upgrades one of the top recommended retrofits. Understanding how blown-in insulation improves energy efficiency starts with recognizing that convective heat loss through gaps in existing insulation is the primary culprit in high heating bills.
Blown-in insulation reduces convective heat loss by filling air gaps that batt insulation misses. On older Ontario homes built before 1990, we routinely find that existing insulation has compressed or shifted, leaving bare spots along the eaves where heat loss is most severe during winter. Addressing those gaps with blown-in material creates a more uniform thermal barrier and can reduce heating bills by 20 to 30 percent depending on the starting condition.
Does blown-in insulation help with summer cooling costs?
Yes. A well-insulated attic keeps radiant heat from the roof deck out of the living space during summer. Homeowners who upgrade to R-50 or higher often report noticeably cooler upper floors and reduced air conditioning run times, particularly in two-storey homes where the second floor tends to overheat.
Pros and Cons of Blown-In Insulation
Weighing the pros and cons of blown-in insulation helps homeowners set realistic expectations. Blown-in insulation offers seamless coverage, fills irregular spaces, and is cost-effective for large attics. It can be added over existing insulation without removing drywall, making it ideal for retrofits. The material is available in both fibreglass and cellulose, giving homeowners flexibility based on budget and moisture conditions.
On the downside, blown-in insulation can settle over time, especially cellulose, and requires proper ventilation to avoid moisture trapping. It is not ideal for open wall cavities without a dense-pack technique and can be displaced by wind if the attic has open soffits without baffles. Installing ventilation baffles at the eaves before blowing in material is crucial to maintain soffit airflow. Blown-in insulation does not provide an air barrier on its own, so air sealing should always be completed before insulation is added.
What Does Blown-In Insulation Cost in Ontario in 2026?
Understanding the cost of blown-in insulation in Ontario is essential for budgeting. Fibreglass blown-in insulation typically costs $1.00 to $2.00 per square foot installed, while cellulose runs $1.25 to $2.50 per square foot. For a 1,200 sq ft attic topped up from R-20 to R-50 with fibreglass, homeowners can expect to pay roughly $1,500 to $3,000 installed. Cellulose for the same attic would run $1,800 to $3,600. A 1-storey bungalow with straightforward attic access typically falls at the lower end of these ranges, while a 2-storey home with limited hatch access and multiple attic sections can push costs 20 to 30 percent higher.
Costs increase if old insulation must be removed due to contamination, if mould remediation is needed, or if ventilation baffles must be added. Rebate programs such as the Canada Greener Homes Grant and Enbridge Home Efficiency Rebate can offset a portion of the cost, though a pre-retrofit energy audit (typically $300 to $600) is often required to qualify.
How much does it cost to insulate a 1,200 sq ft attic?
A 1,200 sq ft attic topped up to R-50 typically costs $1,500 to $3,600 depending on material choice, existing insulation condition, and whether air sealing or baffle installation is included. Getting a detailed scope of work before signing a contract helps avoid surprise add-ons.
The Blown-In Insulation Installation Process: Step by Step
The blown-in insulation installation process begins with a pre-installation assessment to inspect for moisture damage, mould, pest activity, and ventilation adequacy. Next, air sealing is performed around plumbing stacks, electrical penetrations, pot lights, and the attic hatch. Ventilation baffles are then installed at each rafter bay along the eaves to maintain soffit airflow.
Depth markers are set across the attic floor to ensure uniform coverage to the target R-value. Material is blown in using a pneumatic machine, starting from the far end of the attic and working back toward the access point. Finally, depth and coverage are verified at multiple locations, and the attic hatch is weather-stripped and sealed.
On-site work typically takes 4 to 8 hours for a 1,000 to 1,500 sq ft attic. The total project lifecycle, including the initial assessment, scheduling, potential energy audit for rebate eligibility, and any follow-up inspection, can span 1 to 3 weeks.
How long does blown-in insulation take to install?
On-site installation takes 4 to 8 hours for a standard attic. The total project timeline, including pre-installation assessment, scheduling, and any rebate-related energy audits, typically ranges from 1 to 3 weeks. Larger or more complex attics with mould remediation or insulation removal may extend the timeline further.
Blown-In Insulation Lifespan and Long-Term Performance
Fibreglass blown-in insulation has an expected lifespan of 25 to 50 years with minimal settling, while cellulose lasts 20 to 30 years but may require periodic top-ups due to settling. Factors like moisture intrusion, inadequate ventilation, and pest activity can shorten blown-in insulation lifespan significantly.
We recommend a visual attic inspection every 2 to 3 years, or after any roofing work, to check insulation depth and condition. When our crews complete a shingle roofing replacement using products like GAF Timberline HDZ or Owens Corning Duration shingles, we always recommend the homeowner check their attic insulation depth at the same time. It is the most convenient opportunity to catch issues before they become costly.
Does blown-in insulation need to be topped up over time?
Cellulose may need a top-up after 10 to 15 years due to its 15 to 20 percent settling rate. Fibreglass settles far less and rarely needs topping up within its lifespan. Regular inspections help you catch settling or damage early and maintain the rated R-value.
Ice Dam Prevention with Proper Insulation
Ice dams form when heat escaping through a poorly insulated attic warms the roof deck, melting snow that refreezes at the colder eaves. Ice dam prevention with proper insulation requires reaching R-50 or higher, combined with adequate ventilation, to keep the roof deck cold and break this cycle. Insulation, ventilation, and air sealing must work together as a system.
Ontario typically experiences over 100 freeze-thaw cycles per winter, making ice dam prevention critical. Ice dam damage can void shingle warranties if inadequate ventilation or insulation is a contributing factor. As a GAF Certified and Owens Corning Preferred Contractor, we see firsthand how insulation deficiencies contribute to premature shingle failure and costly ice dam repairs during Ontario winters. Addressing insulation before or during a metal roof installation is always the most cost-effective approach.
Can blown-in insulation prevent ice dams?
Blown-in insulation significantly reduces ice dam risk by keeping the roof deck uniformly cold. However, insulation alone is not enough. Proper soffit-to-ridge ventilation and thorough air sealing around penetrations are equally important. All three elements must work together for reliable ice dam prevention.
Spring Maintenance for Attic Insulation
Spring is the best time to inspect your attic for signs of moisture, ice dam damage, or compressed insulation. Prioritizing spring maintenance for attic insulation allows you to catch winter damage early and schedule any top-ups or repairs during the ideal summer installation window. Summer and early fall are ideal for installation due to dry conditions and easier scheduling ahead of the heating season. Winter is not ideal for installation due to cold temperatures and potential moisture issues, but emergency top-ups are possible when needed.
Check insulation depth against the OBC R-50 target using a ruler at multiple points across the attic floor. Avoid compressing blown-in insulation by storing items on top of it, as compression reduces R-value proportionally. Keep the attic hatch well-sealed and insulated, as it is one of the most common sources of heat loss in an otherwise well-insulated attic.
When is the best time of year to add blown-in insulation?
Summer and early fall offer the best conditions for blown-in insulation installation. Dry weather reduces moisture risk, and completing the work before heating season means you benefit from the full winter of energy savings. Scheduling is also typically easier outside the peak roofing season.
Common Mistakes to Avoid with Blown-In Insulation
Skipping air sealing before insulating is the most common and costly mistake. Without sealing gaps around plumbing stacks, electrical boxes, and the attic hatch, warm moist air continues to leak into the attic, reducing insulation effectiveness and increasing condensation risk. Blocking soffit vents with insulation is another frequent error that leads to moisture buildup and potential mould growth.
Installing over wet or mouldy insulation traps moisture and worsens existing problems. Choosing material based solely on cost without considering your attic’s ventilation and moisture profile can also lead to issues. Reputable installers leave depth markers throughout the attic and provide a certificate of installed R-value. If your installer does not offer this documentation, that is a red flag.
Frequently Asked Questions
How does blown-in insulation work?
Blown-in insulation uses a pneumatic machine to blow loose particles of fibreglass or cellulose into attic spaces. The material fills gaps around joists, wiring, and plumbing, creating a seamless thermal layer. Unlike batt insulation, it conforms to irregular shapes and hard-to-reach areas, reducing thermal bridging and improving overall coverage across the attic floor.
Is blown-in insulation better than batt insulation for attic retrofits?
For attic retrofits, blown-in insulation generally provides more consistent coverage than batts because it fills small gaps, corners, and areas around obstructions. Batts can leave voids if not cut precisely. Blown-in can also be installed over existing insulation without removing drywall. However, batts may be more practical for accessible, uniform wall cavities during new construction.
How much does blown-in insulation cost in Ontario?
In Ontario, blown-in insulation typically costs $1.00 to $2.50 per square foot installed, depending on the material, target R-value, and attic accessibility. For a 1,200 sq ft attic topped up to R-50, homeowners can expect to pay roughly $1,500 to $3,600. Additional costs may apply for old insulation removal, air sealing, mould remediation, or ventilation baffle installation.
What R-value does blown-in insulation provide?
Blown-in fibreglass provides approximately R-2.2 to R-2.7 per inch, while cellulose provides R-3.2 to R-3.8 per inch. To meet the Ontario Building Code’s R-50 attic requirement, you would need roughly 14 to 16 inches of cellulose or 18 to 22 inches of fibreglass. R-value is cumulative, so new material added over existing dry insulation increases the total.
How long does blown-in insulation last?
Fibreglass blown-in insulation can last 25 to 50 years with minimal settling. Cellulose typically lasts 20 to 30 years but may settle 15 to 20 percent over time, requiring a top-up to maintain its rated R-value. Lifespan depends on moisture control, ventilation adequacy, and whether the attic remains free of leaks and pest activity. Inspections every 2 to 3 years help catch issues early.
Can I install blown-in insulation myself?
DIY installation is possible using rental blowing machines available at some building supply stores. However, the results are often inconsistent without experience. Professional installers ensure proper air sealing first, maintain correct depth and density, install ventilation baffles, and provide documentation of the installed R-value. For rebate eligibility, professional installation and a pre-retrofit energy audit are typically required.
Upgrading attic insulation with blown-in material remains one of the most cost-effective ways to improve comfort and reduce energy bills in Ontario homes. Whether you choose fibreglass or cellulose, the key is pairing proper air sealing and ventilation with the right depth of insulation to meet or exceed OBC R-50 requirements. For homeowners dealing with urgent weather-related damage, our emergency roof repair services page covers what to expect. If you notice signs your attic is poorly insulated, scheduling an assessment before winter can prevent costly heating losses. When planning a comprehensive upgrade, consider pairing insulation work with professional roof repair to address both thermal performance and structural integrity in one project.